

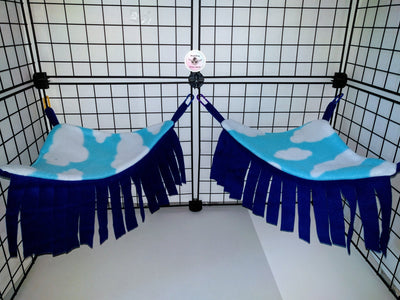
How To Sew A Small Animal Cube
Making a Corner Cube Hideout
Posted by Summer Wright on
This tutorial will bear witness yous how to make a Corner Cube with hidden seams.I'll list example sizes below, but you can make them bigger or smaller with a few tweaks. (Try to ignore my poor, abused tabular array, it'southward just used every bit a cutting mat a lot.)
This web log post may incorporate Amazon Affiliate links. Every bit an Amazon Associate I earn from qualifying purchases.
Supplies needed:
*Optional supplies
Material Needed:
-Fleece Solids:
- One 13" x 6" rectangle
- Two 9" 10 half dozen" rectangles
- One ten" foursquare, cutting diagonal
-Fleece Prints:
- One 13" ten six" rectangle
- Two 9" x 6" rectangles
- One 10" square, cutting diagonal
-Three i" x 4" fleece strips for hanging tabs
If yous don't know which side of fleece is the 'right' side, hold the fabric so information technology stretches beyond, then pull slightly. The edges of the fabric will gyre towards the 'wrong' side.
Step Ane:
First, we'll brand our entrance hole. Grab your ii thirteen" ten 6" pieces, these will exist the front of the corner cube. Place them on top of each other and line them up, right sides facing together.Using something circular, trace around where your archway hole will be. I apply a small treat container for small ones and the within of a gyre of tape for larger ones.

Stride two:
After tracing, get ahead and cut out the hole and sew together effectually it.
Optional: Yous can sew effectually it first and so cutting the hole, if y'all'd prefer(simply be conscientious non to cut though the stitching).

Step three:
Flip the pieces inside out through your entrance hole, so that the correct sides are at present facing away from each other. You can top stitch around the entrance to make it more neat and hold everything together nicely.

Step four:
Now it's fourth dimension to sew the sides, we'll outset with the print layer.
Lay downwardly your front console laying with the print up, and grab one of your 9" x 6" pieces. Line it up right side down with the edge of the front console. Sew the two print layers together, like pictured. Make sure to fold the solid layer out of the way and don't sew through information technology!
Optional: Trim around the solid pieces to make them a fleck smaller, so the inside doesn't bunch upward and then much.

Step five:
After you sew the first side on, fold the layers open(like a book). Grab your second 9" x 6" and repeat step 4.

Footstep half dozen:
After sewing the second side on, open up the layers over again(similar a book). You should now have a long rectangle of connected sides. Fold the pieces in half like shown, making sure the solid layer on the front piece is facing outwards. Sew together down the right edge to connect the impress layer.

Step seven:
Repeat on solid side. In one case finished, it should await near like this.

Pace viii:
Take hold of 1 of your print triangles and run up the peak layer on. Make sure to sew tabs into the corners! I detect it easiest to commencement by lining upward ane of the curt sides on the triangle piece and my side panel. Yous can pin or clip the elevation triangle onto your side and front panels to make it easier to sew around.
Next, sew the bottom triangle on. leave a gap to flip the corner cube, well-nigh 1.5 inches long. I leave my gap on the back side of the bottom. Yous tin leave yours somewhere else if you'd like though.
A due north easy fashion to do the corners is to keep the needle in the material, elevator the presser foot, plow the fabric and line it up, so put the pes dorsum downwardly and proceed. To make the tabs:Fold your strips in half to make them loops, and then line upwards the open ends with the edge of where yous're sewing. 
Step 9:
Repeat step eight on the solid side(skipping the tabs and turning hole).Flip the entire corner cube through your turning hole, and sew the pigsty closed with a tight stitch. Push the solid layer inside the print layer, and so you're done!
Optional: You can likewise add together a couple tight stitches on the top edges to help keep the inside layer from falling downward.

I hope this tutorial helped! Experience free to leave a comment below and allow me know how yous liked it, or if you take any additional questions! If y'all'd like to buy i of these instead, you lot can get them here.
Stay motivated to help forestall boredom and burnout! Try listening to music, audiobooks, or podcasts while you work. My favorite service is Aural(cost varies, use my link for ii gratuitous books), especially with their new 'Plus' catalog, that you can listen from at no extra price with your membership.
Related Articles

This tutorial will prove yous how to make a fleece...
This tutorial volition show yous how to brand a pair...

Corner Baskets are an awesome, versatile piece. Y'all can use...

OE, or Open up Surround, pouches are something I run across a lot...

This 'tutorial' is a bit dissimilar from my normal ones,...

Cutting mats are awesome, only I've establish fleece to get...

Want to learn how to make your own safe cage...
Sleeping Pouches are a must for any cage, and are...
- Tags: corner cube, cube, ferret, republic of guinea pig, hedgehog, rats & mice, sugar glider
Source: https://www.deathpupgliderstuff.com/blogs/sewing-tutorials/making-a-corner-cube-hideout
Posted by: renfroeshunt1950.blogspot.com
0 Response to "How To Sew A Small Animal Cube"
Post a Comment